
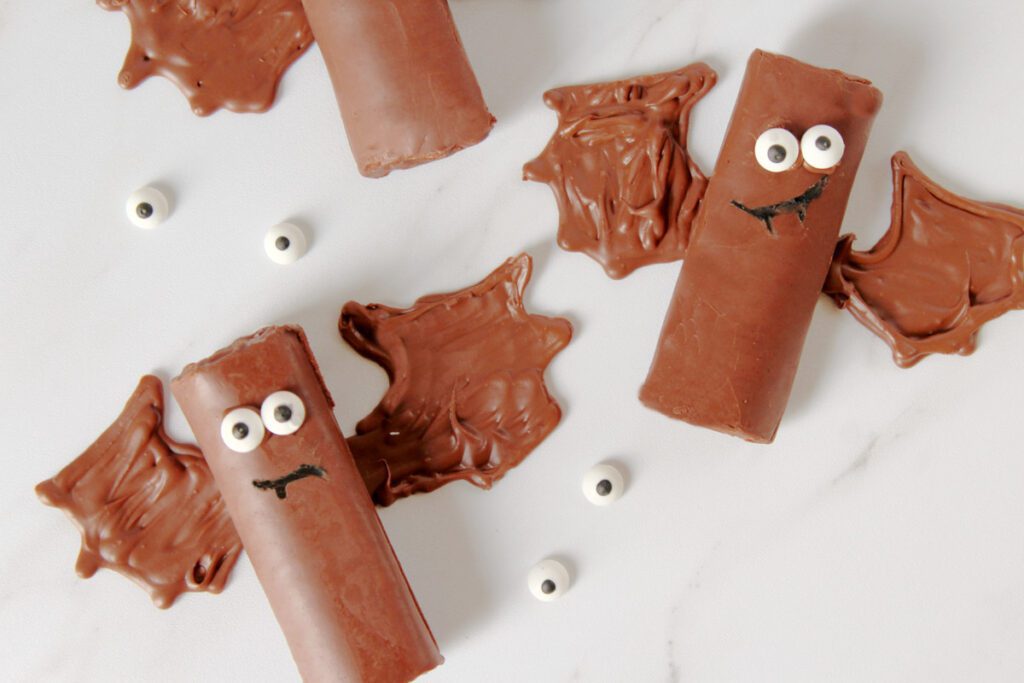
Swiss Roll Bat Cakes will take your Halloween treats from boring to spooktacular! They’re easy as can be and make for a perfect party treat.
Swiss Roll Halloween Bat Cakes
Whether it’s a school party, church trunk-or-treat, or get-together with friends, I’m always needing fun and simple treat recipes for Halloween! Thank goodness for these crazy simple Halloween Bat Cakes.
You can stop scrolling through Pinterest ideas now because these bat cakes are so easy and look so spooky and fun.
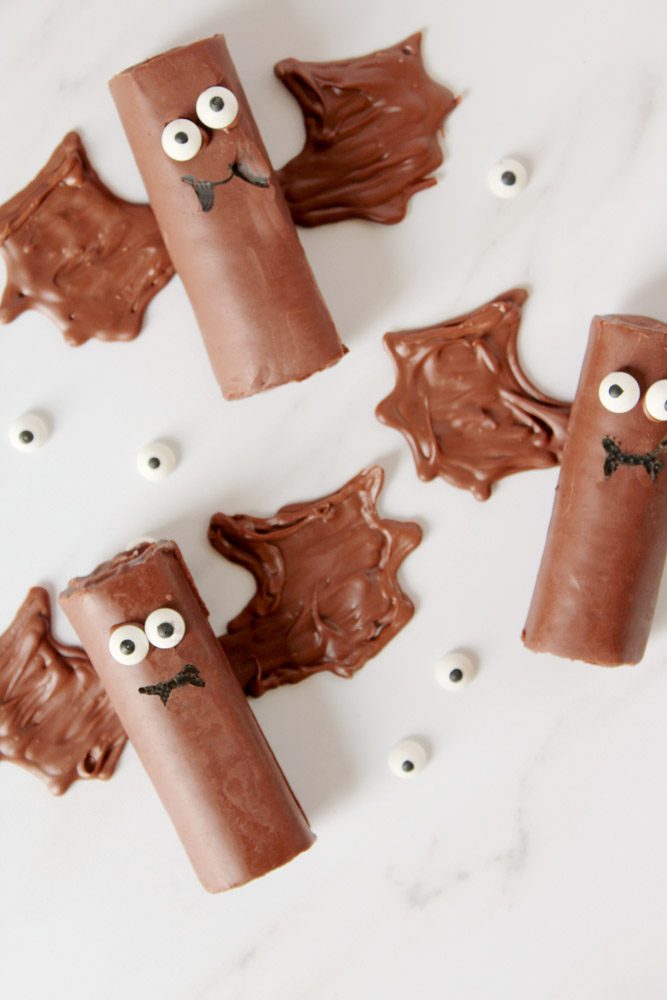
All you need to do is add some chocolate wings to some premade Swiss Rolls and add some bat details! They look amazing and kids and adults all love to eat them.
I can’t wait to sit down with some Halloween books and snack on these with my kids this Halloween!
More Halloween recipes you’ll love
- DIY Halloween Popcorn Balls in under 30 Minutes
- The Cutest Pumpkin Pie Rice Krispie Treats
- Pumpkin Cobbler [The Perfect Fall Dessert]
Halloween Bat Cakes Recipe
Halloween Bat Cakes are so fun! I love how easy it is to turn one of my kids’ favorite treats into spooky characters.
Ingredients
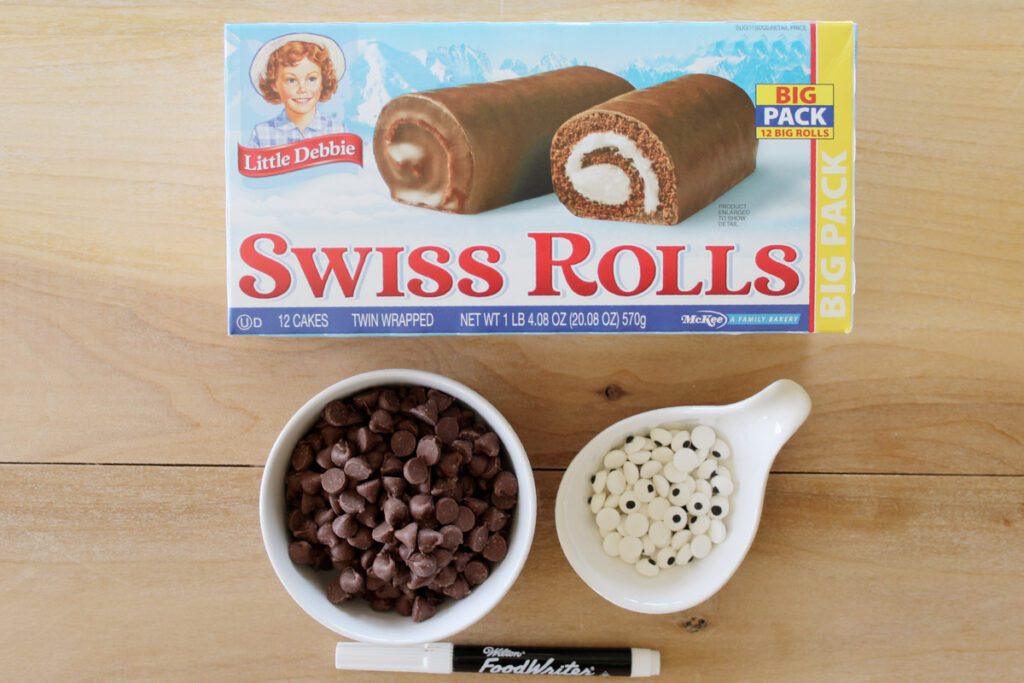
- 1 box Little Debbie Swiss Rolls
- Black edible food coloring marker
- 1 ½ cups milk chocolate chips or candy melts
- Candy eyes
The Following Tools Will Be Helpful When Making These!
How to Make Halloween Bat Cakes
Don’t forget to download the full printable recipe below so you can print it out and use it whenever you feel like making this delicious recipe!
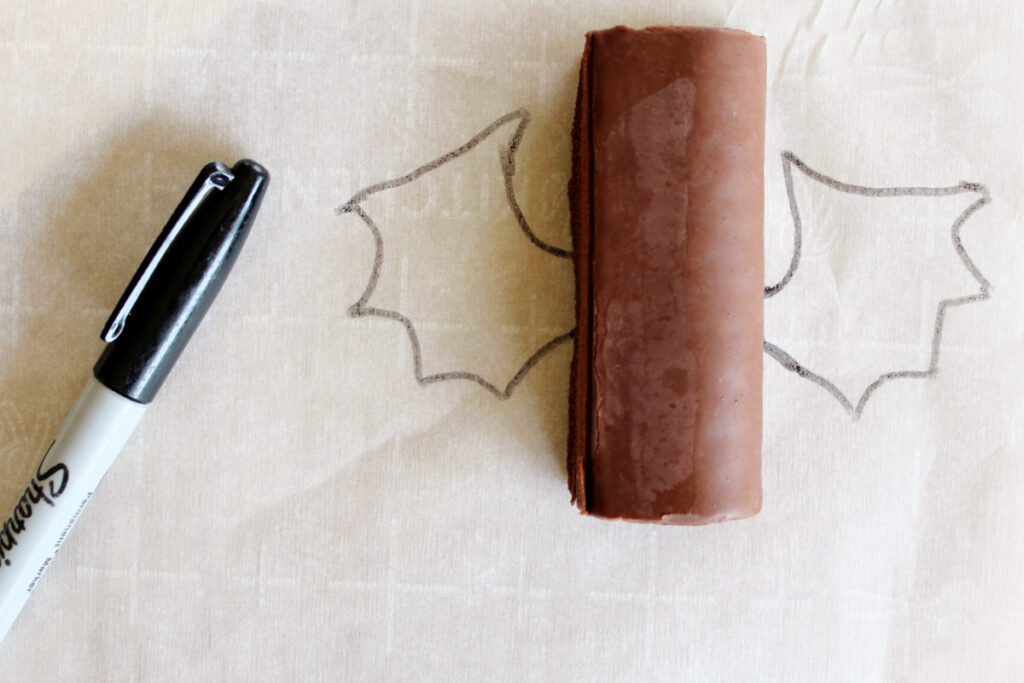
- To make your Halloween bat cakes, start by getting a piece of parchment paper and laying it on a baking sheet.
- On the parchment paper, draw with an edible marker an outline of a pair of wings for each snack cake, making sure to leave room in the center to place the cake.
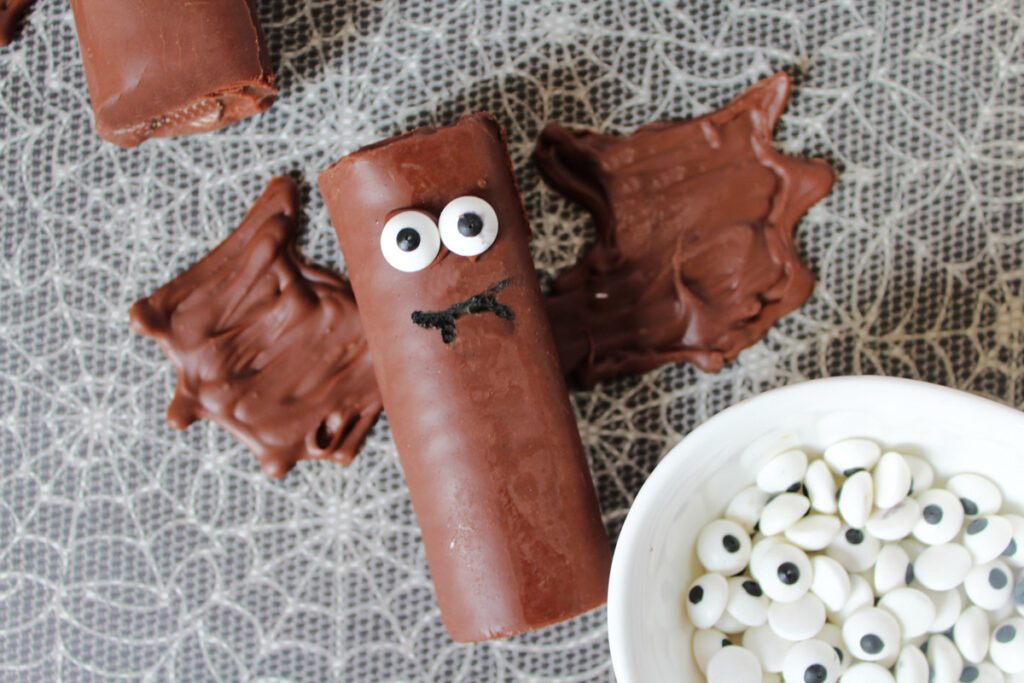
- Using the edible marker again, open the snack cakes and draw a mouth or fangs on each cake.
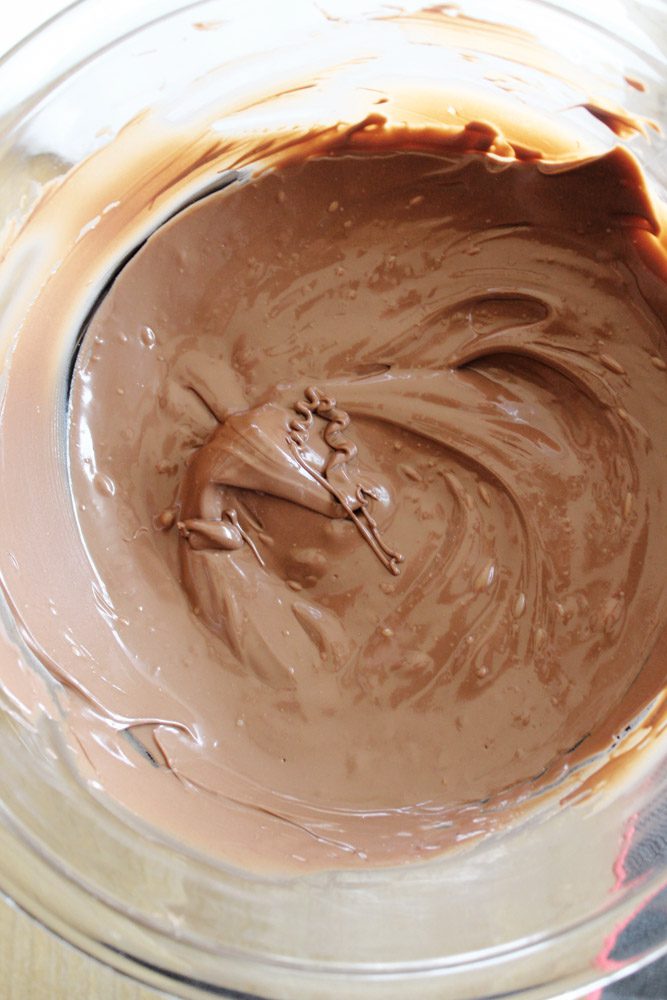
- Place the double broiler over medium-low heat and add in the chocolate.
- Stir the chocolate continuously until it’s completely melted and smooth.
- Once smooth, transfer the chocolate into a small squeeze bottle or a piping bag.
- Squeeze a tiny drop of chocolate on the back of an eye and use it as “glue” to stick it to one of the bat cakes above the mouth.
- Repeat with the remaining eyes until each snack cake has two.
- Set the snack cakes aside.
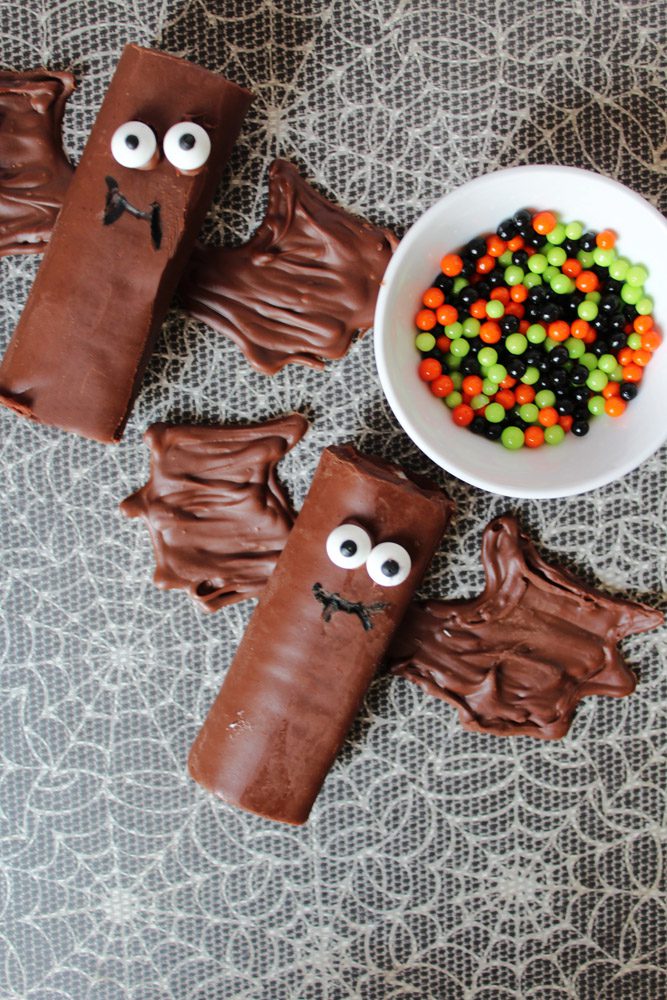
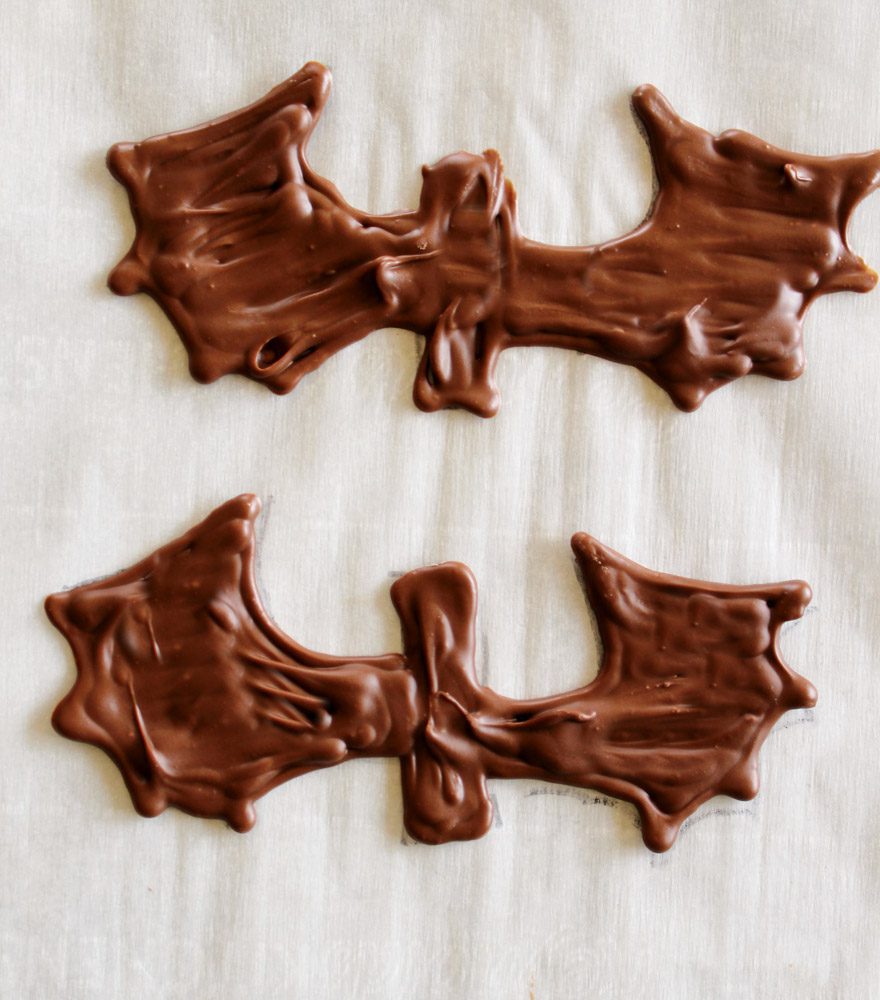
- Next, squeeze more melted chocolate in each wing outline until they are all filled completely.
- Let the chocolate set briefly, then pipe a strip of chocolate between each pair of wings and add a finished snack cake on top of the strip.
- Place the baking sheet with the bat cakes in the fridge for 5-10 minutes so that they can fully set.
- When they are fully set, take the tray out of the fridge and remove each finished bat from the parchment.
Tips Tricks and FAQs
- I would suggest using parchment paper sheets instead of rolls for this recipe. You want a completely flat surface and parchment rolls tend to roll back up after you tear off a sheet. If parchment rolls are all you have, just use a glass or other heavy object on each corner of the piece you tear off to help everything stay flat as you work.
- If your chocolate is starting to seize or isn’t melting smoothly, you can add about a teaspoon of any oil that you have in your pantry. My personal favorite oil to use when melting chocolate is coconut oil. It doesn’t have much of a flavor so you won’t notice it’s in there!
- I’m definitely not an artist! If you aren’t either, you can print off bat wings and lay the printed picture under the parchment, and trace over them. Then you don’t have to worry about trying to freehand perfect wings!
Storage
Store the bat cakes in sealed bags or containers on the counter for up to 5 days. You may want to keep them in the fridge if your home is kept warmer than average to prevent any melting!
More Easy Fall Recipes
- Pumpkin Banana Muffins with Streusel Topping
- Pumpkin Monkey Bread [Made From Scratch!]
- Crowd Favorite Pumpkin Chili
- Pumpkin Whoopie Pies
Did you make this?

Halloween Bat Cakes
Swiss Roll Bat Cakes will take your Halloween treats from boring to spooktacular! They’re easy as can be and make for a perfect party treat.
Ingredients
- 1 box Little Debbie Swiss Rolls
- Black edible food coloring marker
- 1 ½ cups milk chocolate chips or candy melts
- Candy eyes
Instructions
- To make your Halloween bat cakes, start by getting a piece of parchment paper and laying it on a baking sheet.
- On the parchment paper, draw with an edible marker an outline of a pair of wings for each snack cake, making sure to leave room in the center to place the cake.
- Using the edible marker again, open the snack cakes and draw a mouth or fangs on each cake.
- Place the double broiler over medium-low heat and add in the chocolate.
- Stir the chocolate continuously until it’s completely melted and smooth.
- Once smooth, transfer the chocolate into a small squeeze bottle or a piping bag.
- Squeeze a tiny drop of chocolate on the back of an eye and use it as “glue” to stick it to one of the bat cakes above the mouth.
- Repeat with the remaining eyes until each snack cake has two.
- Set the snack cakes aside.
- Next, squeeze more melted chocolate in each wing outline until they are all filled completely.
- Let the chocolate set briefly, then pipe a strip of chocolate between each pair of wings and add a finished snack cake on top of the strip.
- Place the baking sheet with the bat cakes in the fridge for 5-10 minutes so that they can fully set.
- When they are fully set, take the tray out of the fridge and remove each finished bat from the parchment.

Michele Tripple is a renowned author and expert in the fields of parenting, relationships, and personal development. With her degree in marriage and family studies, her experience as a Family Life Educator, and over a decade of experience as a professional writer, Michele has authored books that provide practical advice and insights into improving family dynamics and personal growth. Her work is celebrated for its blend of research-driven information and relatable, real-world applications. Michele has been a keynote speaker at conferences and has contributed to numerous publications and media outlets, solidifying her reputation as an authoritative voice in her field and helping families build relationships.