
Looking for a beautiful Christmas wreath, but don’t want to spend a fortune? Check out this Pottery Barn Knockoff Cricut craft project that will wow everyone!

Pottery Barn Knockoff Wreath

I love Pottery Barn. I love to scroll through their catalog and dream about everything I would buy if I had millions of dollars to spend on home decor….
This year I fell in love with this Pottery Barn Demi Village Christmas wreath (it’s no longer available), but it was more than I normally spend on Christmas Decorations.
So I decided that it was time to get my Cricut Maker Machine out and work on a little Pottery Barn Knock Off Wreath Project!
I have to say that this Pottery Barn Knock off wreath is pretty dang close to the original! And I am so in love with it!
So, I thought I would share it with you how to make this pretty simple (actually) Pottery Barn Inspired Wreath.
I want to note that this Pottery Barn knock-off wreath is pretty easy to make. It is time-consuming as it takes several hours for your Cricut Maker Machine to cut the chipboard. Also, you need to allow for drying time.
Supplies Needed for Pottery Barn Knock Off Wreath

- Cricut Maker Machine (Must use this specific machine for the project)
• Cricut StongGrip Cutting Mat
• Cricut Knife Blade + Drive Housing
• Scissors
• Heavy Chipboard, 2.0mm
• Fine Glitter in colors: silver and white
• 3oz can of Krylon spray paint in gold
• Floral wire and floral tape
• Super 77 Multi-Purpose Adhesive (or the spray adhesive of your choice)
• Glue Gun and glue sticks
• white acrylic paint and foam brushes or paintbrushes
• Thick 2.5 inch wire ribbon
• School or craft glue
How to Make a Pottery Barn Knock Off Wreath

Floral Hoop:
When making your Pottery Barn Inspired wreath you will want to start by spraying your floral hoop with gold spray paint.
You will want to get an old box or some newspaper to lay underneath it to catch all the overspray. You will want to lightly spray the floral hoop.
Let this fully dry.
Once the hoop is dry you will want to spray it again.
You want to repeat this process until the floral hope is completely covered.
Allow this to dry.
Cricut Maker Instructions for Pottery Barn Inspired Wreath:

First, you will want to gather all your Cricut supplies from the supply list.
Once you have gathered your supplies you will want to turn your Cricut Maker Machine on. Please note for this project you must use a Cricut Maker machine.
You will also want to download the Free Cricut SVG File at the bottom of this post and save it to your computer.

You will then open Cricut Design Space and click “New Project”
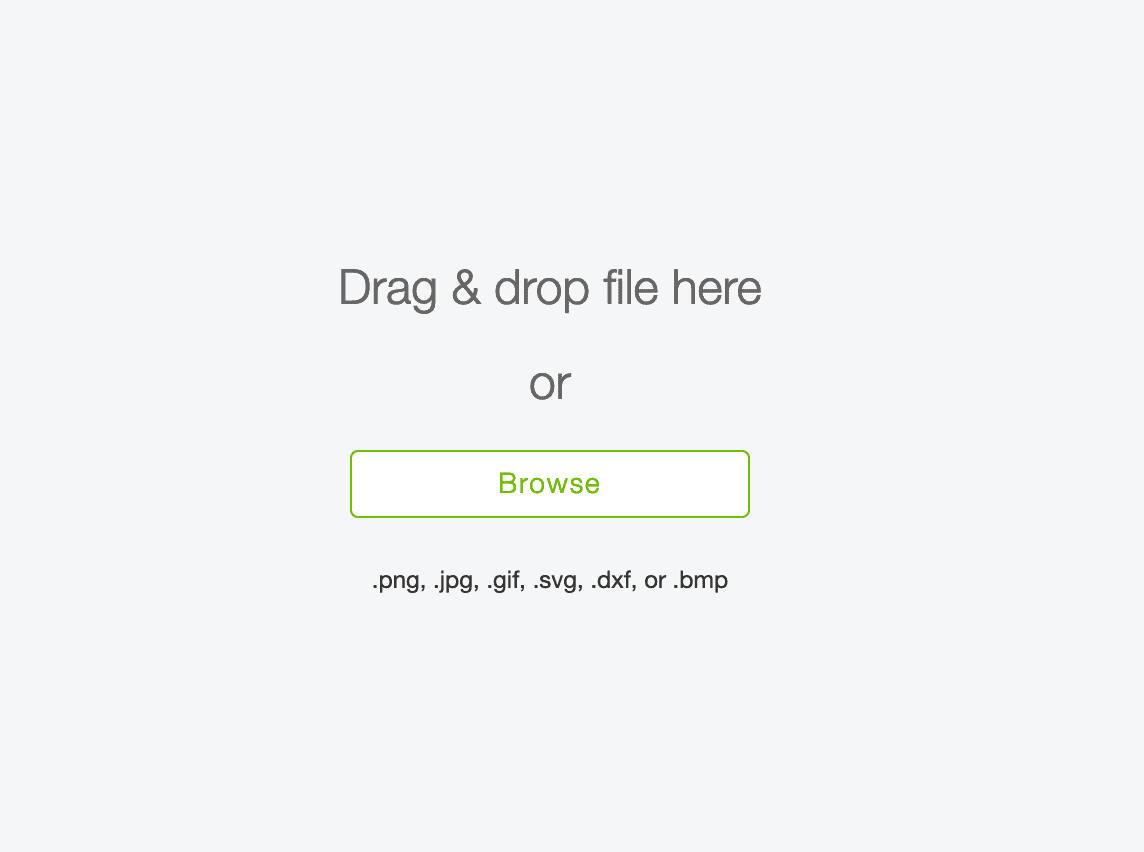
Select the “upload button” on the left-hand panel.
Then click the “Upload image” button.
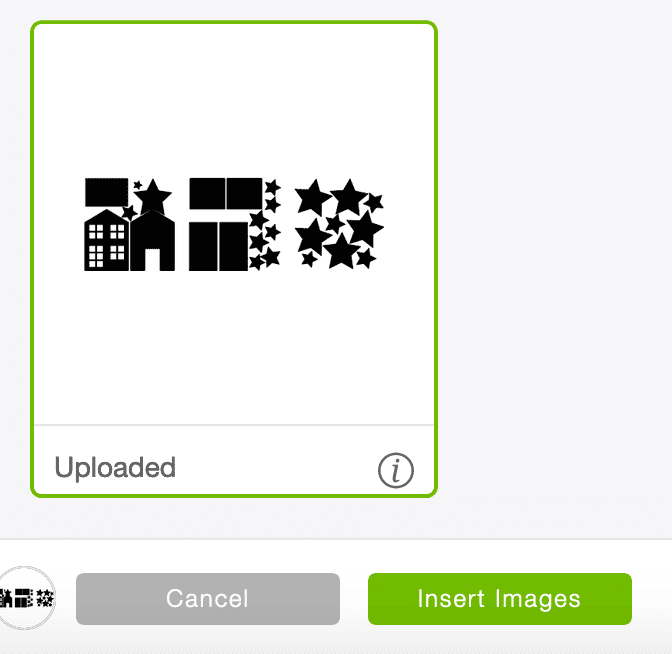
Press the “Browse” button and find the SVG file that you saved for this Pottery Barn Inspired Wreath. Add tags for your project, and hit “save” (bottom right corner).
On the next screen you will want to select the image you just uploaded and then press “insert Images” (Usually found bottom lower-left corner)
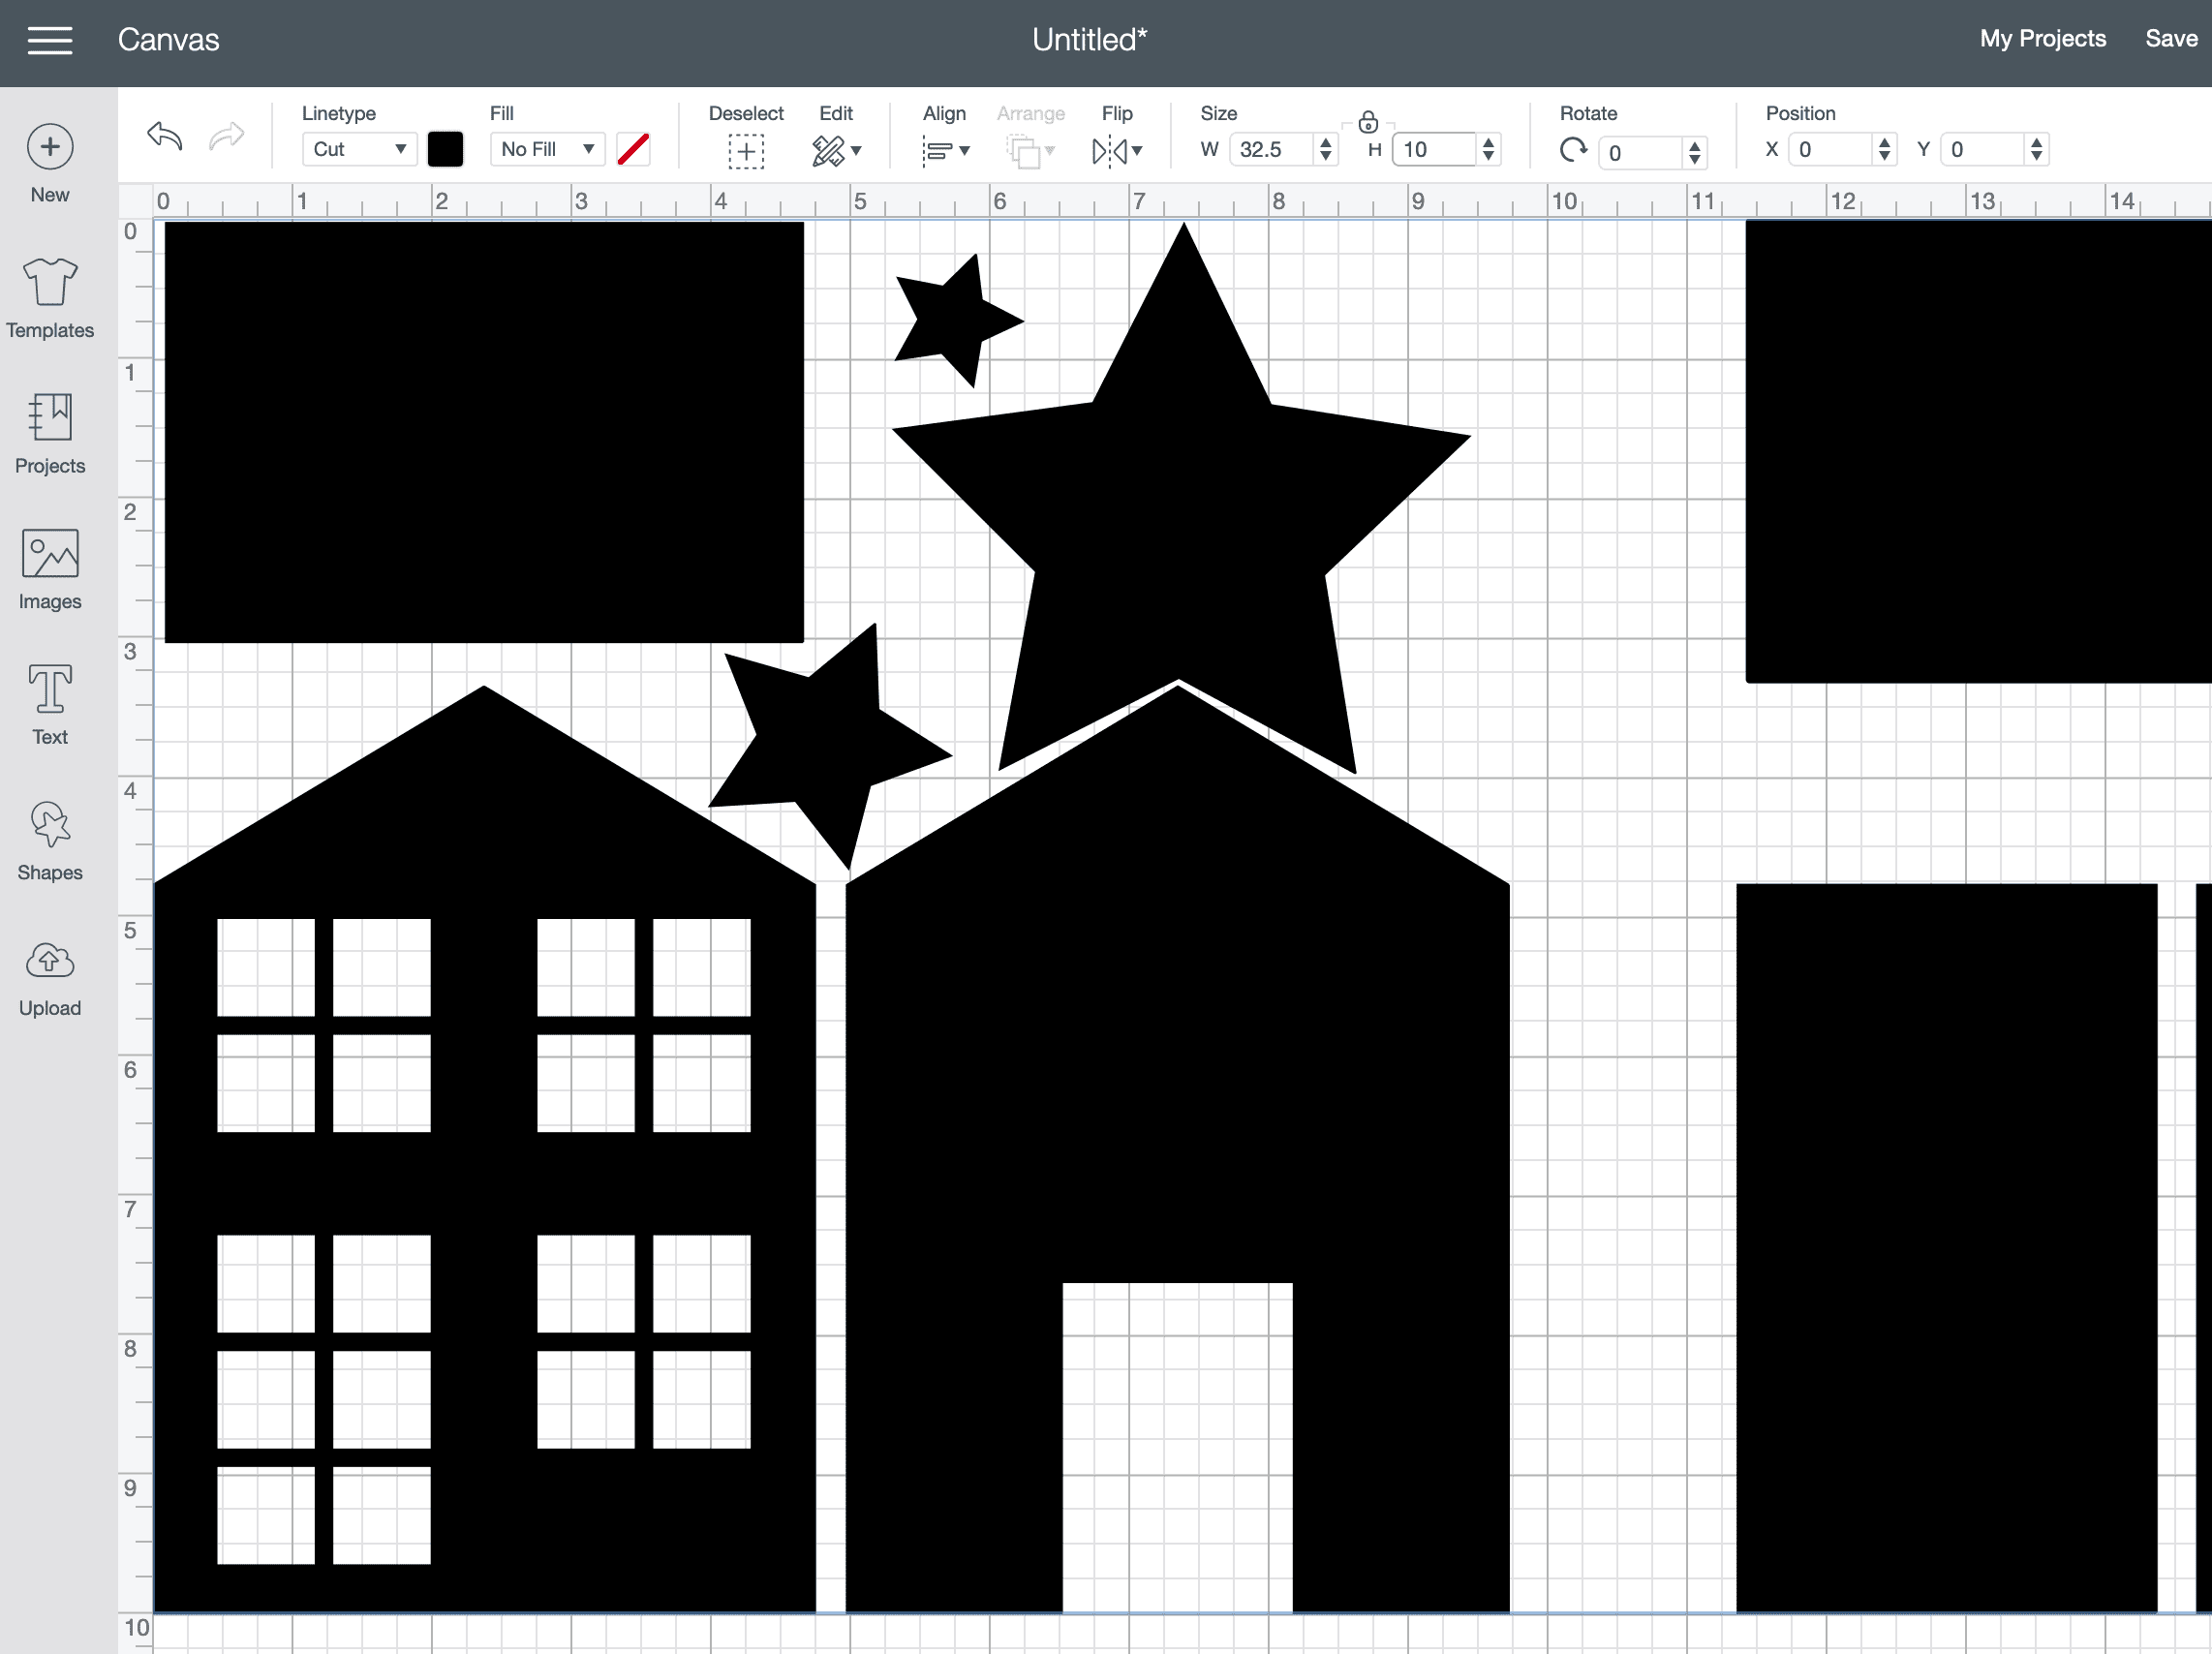
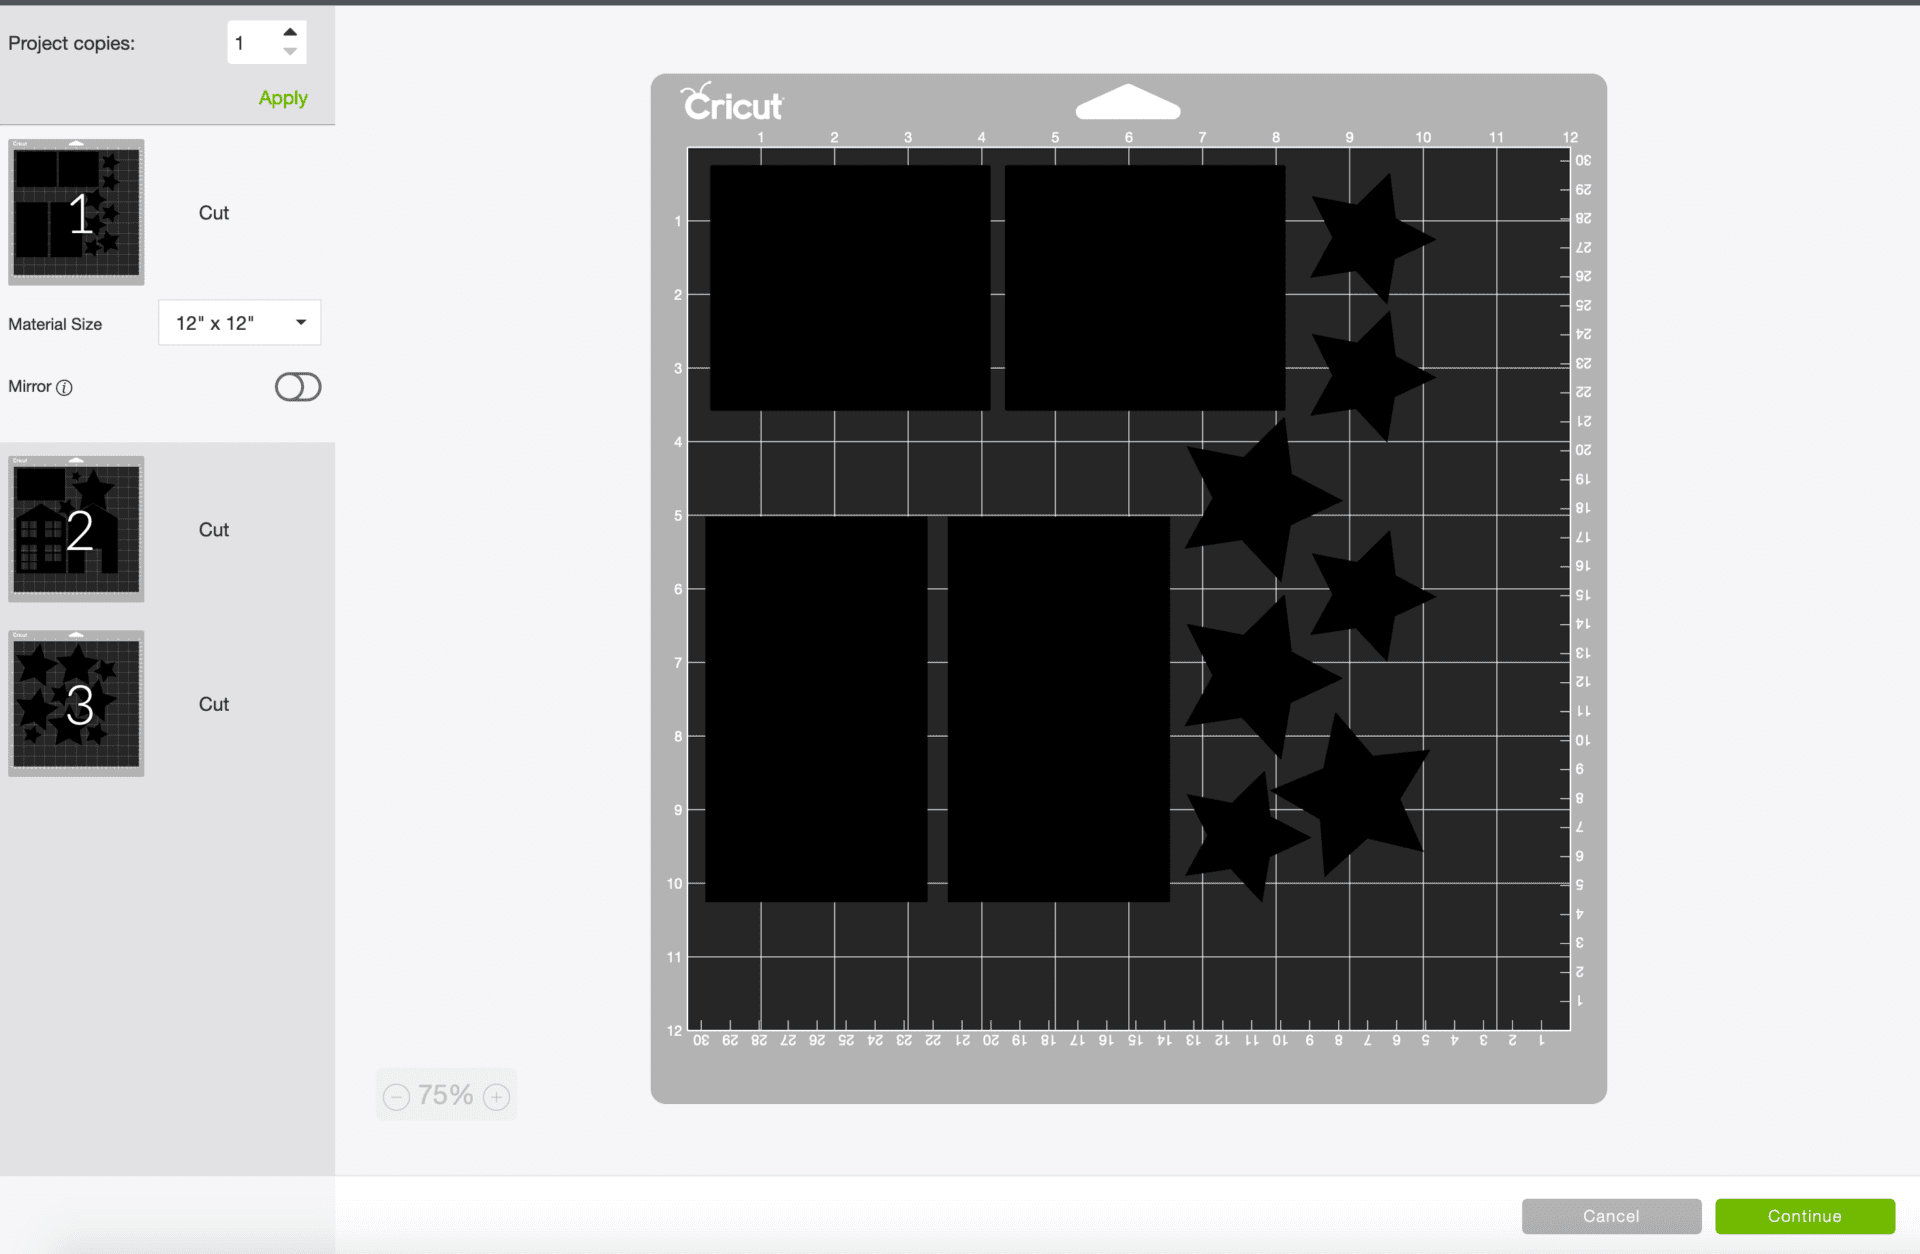
Before moving on, you want to make sure your size is set with these measurements. (W 32.5, H 10)
Also, set the position of your project to X 0, Y 0
Once you have ensured the proper measurements then you will select all and then press the ungroup button: Once they are ungrouped, select the first set of objects and press the attach button. (There are 3 sets total) Then proceed to do the same for the second set of objects, and also the third.
Now it is time to hit the “Make It” button (usually the top right corner)
Select the material size to 11” x 11” since we are using a thick chipboard.
Then press the green “continue” button in the lower right corner.
It’s time to see your Pottery Barn Inspired Wreath Come Alive!
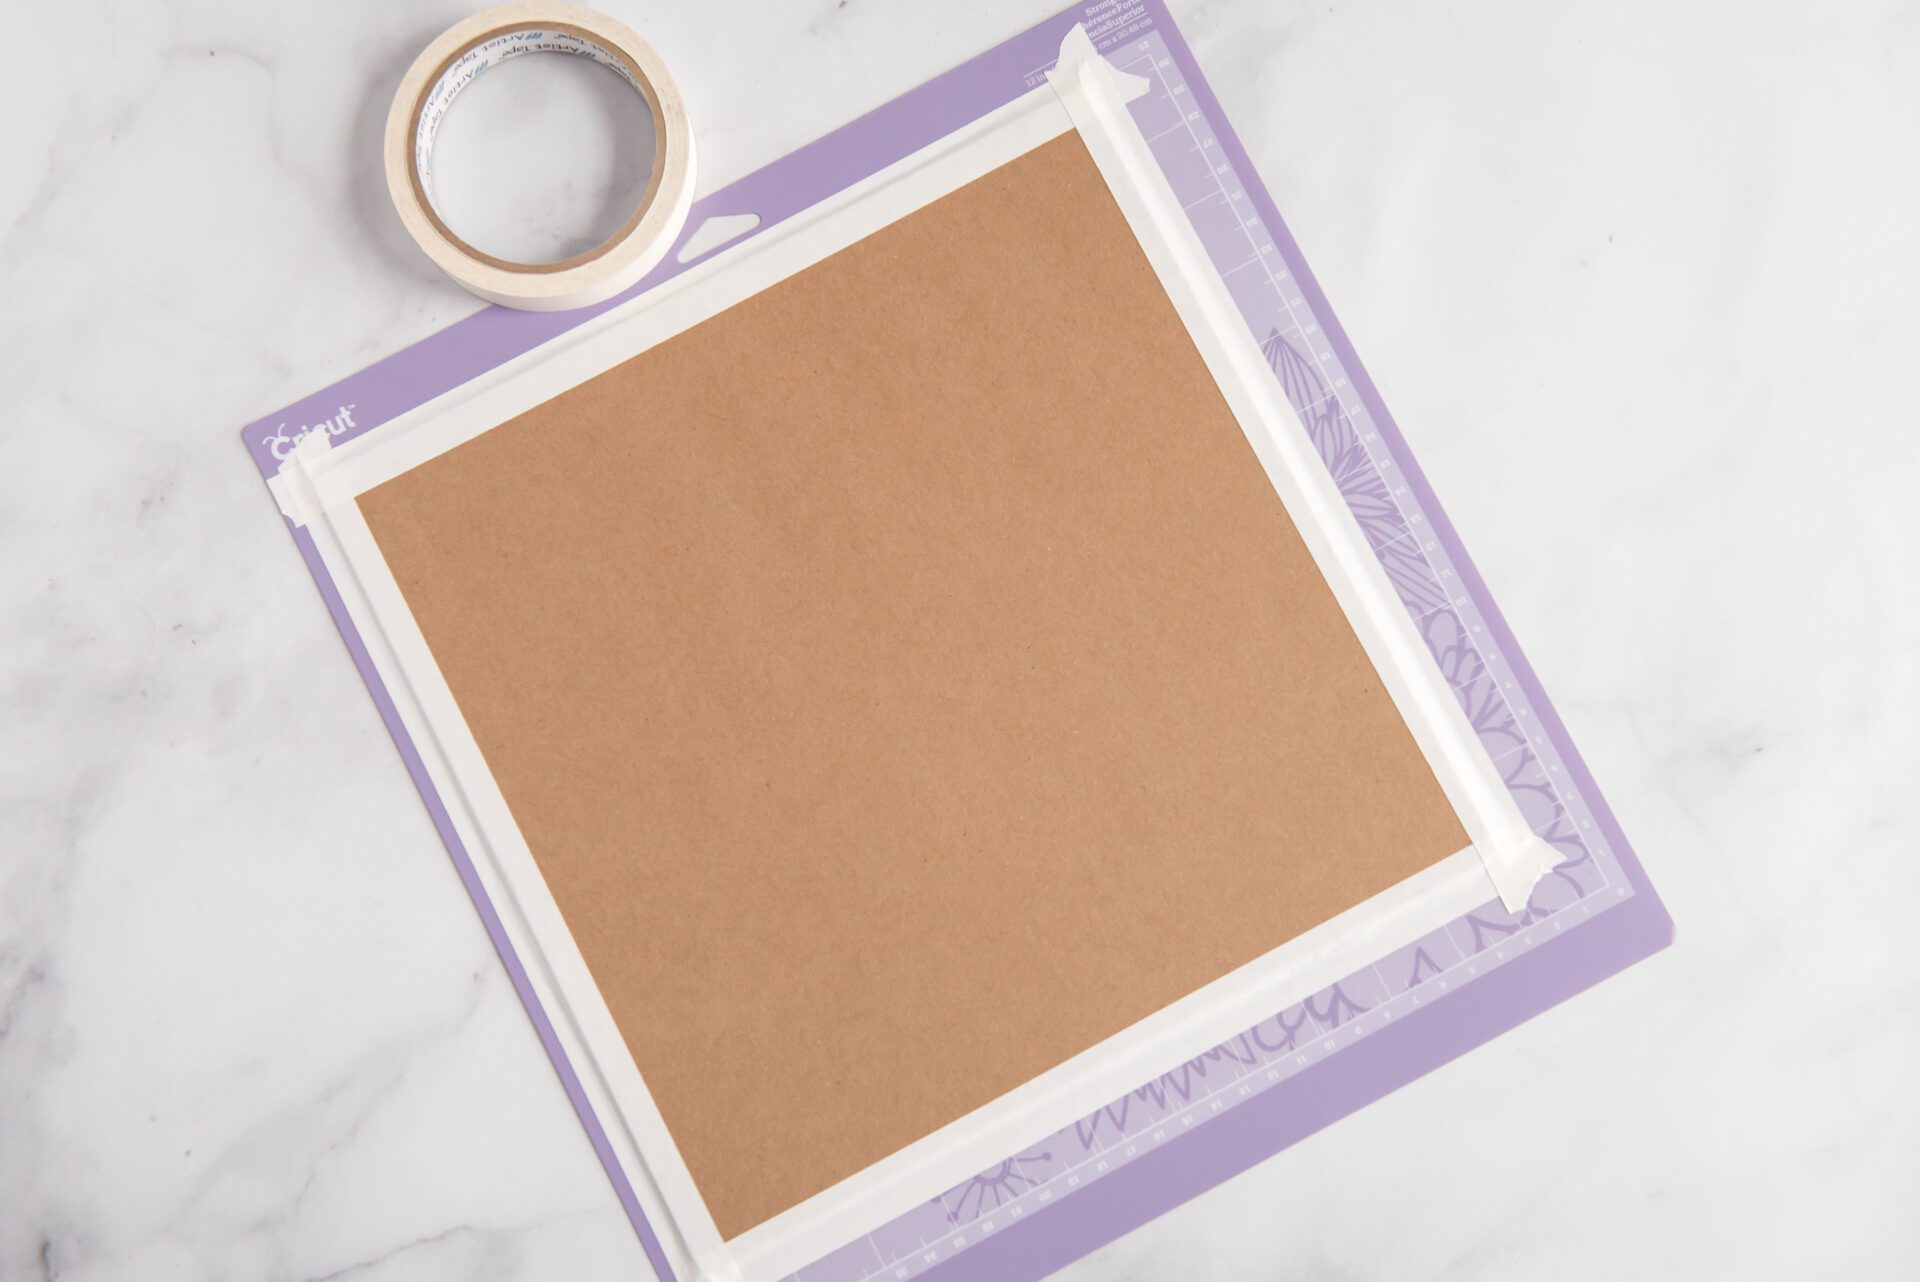


Inset your knife blade into your Cricut Maker Machine and prepare all three of your StrongGrip Cricut mats.
To do this place one sheet of the heavy chipboard in the upper left-hand corner of the mat. Tape this down on the edges with your masking tape.
Once your Cricut mats are prepared, proceed to Design Space and select Heavy Chipboard 2.0 (Next, follow the instructions within the program when to load the machine, and then proceed to cut. Your machine will give you an estimated time for the cut after it makes the first pass over the chipboard.)
Once the cutting is finished you will want to unload the mats from your machine and remove your project.
You will have a house front and a back, 2 sides, 2 pieces for the roof and 19 stars ready to go!
You will want to keep your Exacto knife handy to just in case the machine doesn’t cut the entire way through one of the cuts.
Painting
With a foam brush or roller, you will want to paint (with your acrylic white paint) the front and the back of all the chipboard pieces. You don’t have to paint the back of the front piece because no one will see it.
Let this dry completely.
Once the house is dry, lay the pieces of your house out and start gluing the front, bottom and sides together.
Glitter:
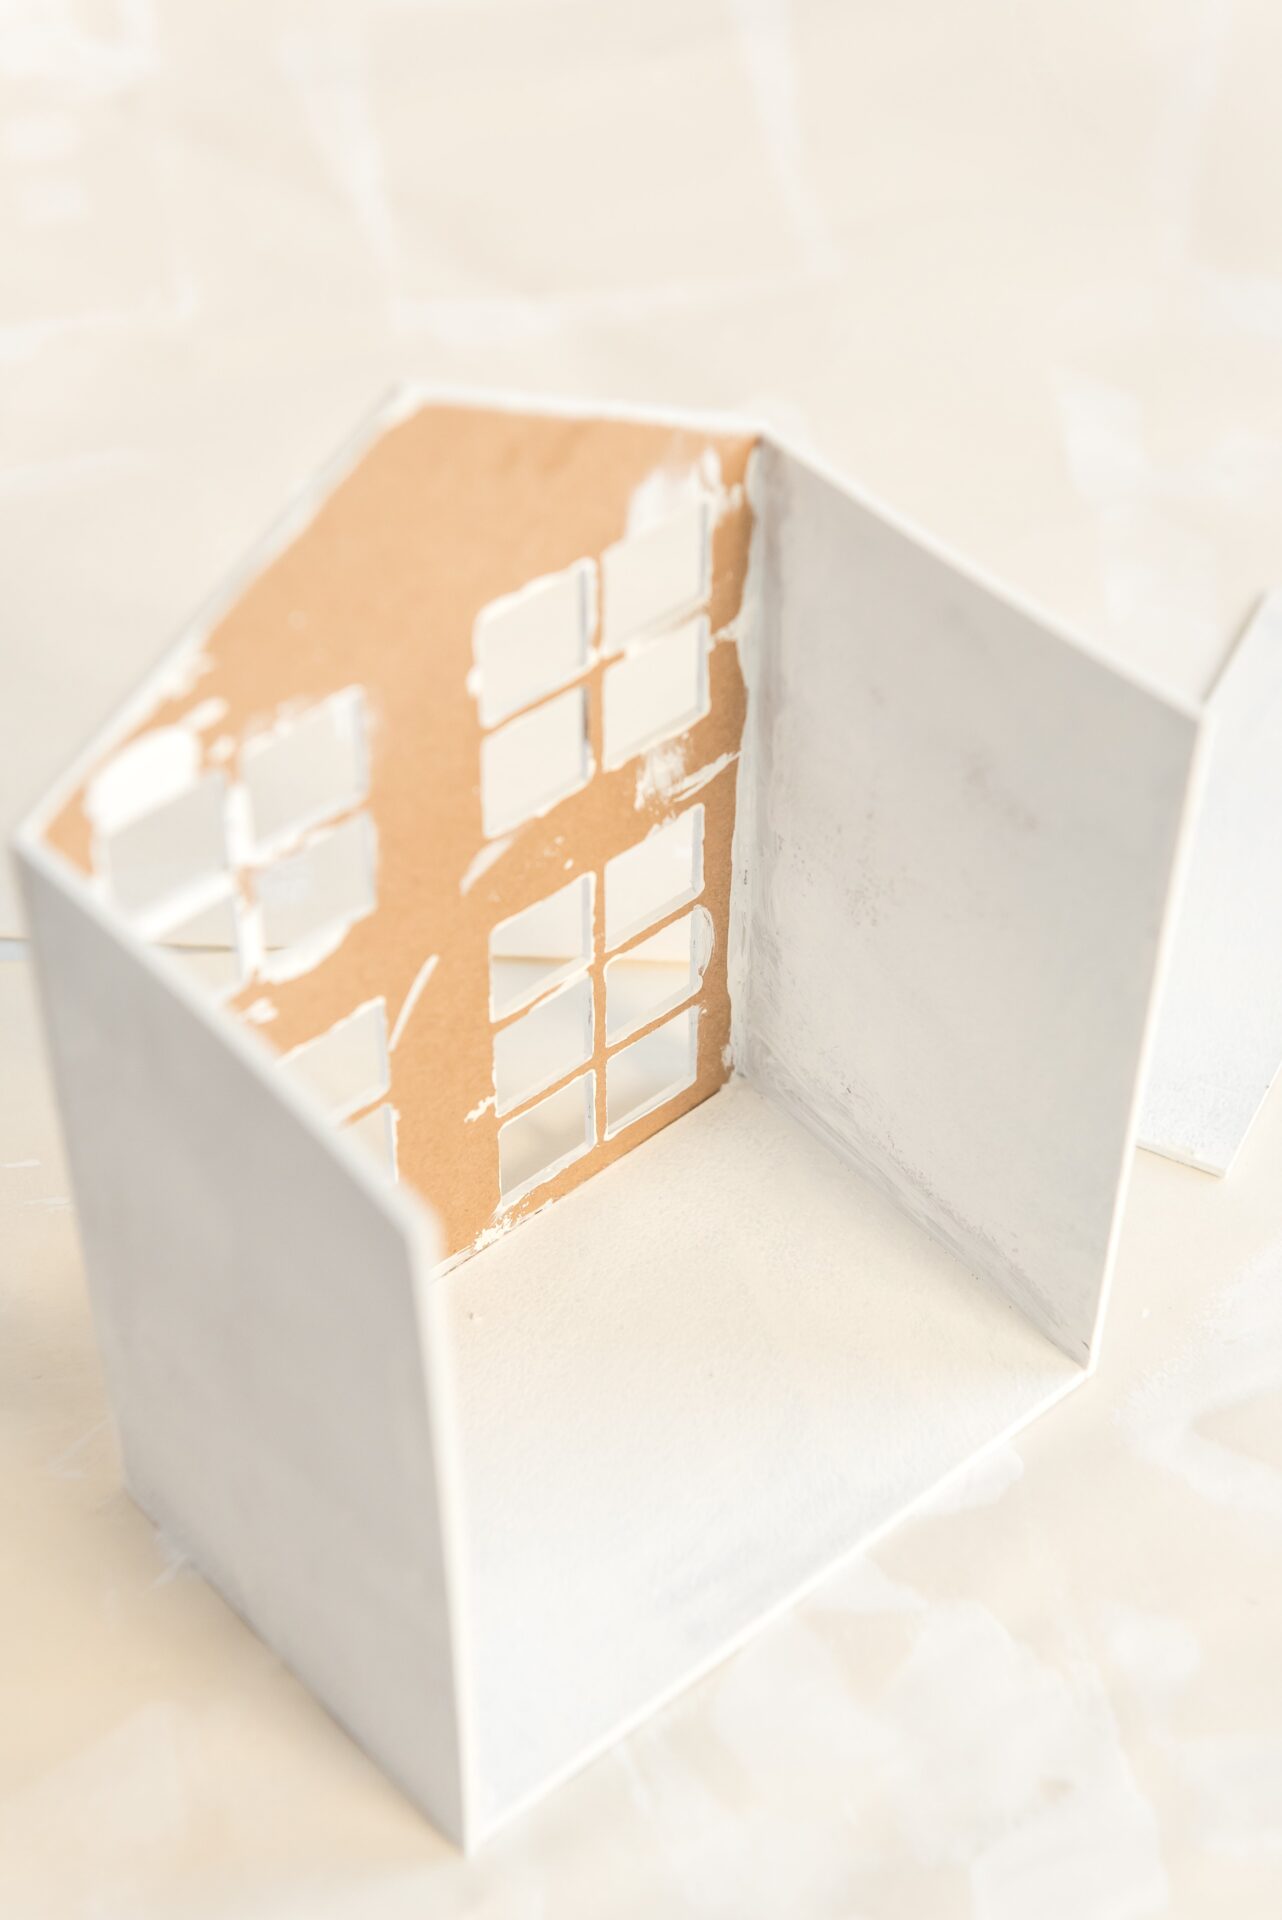
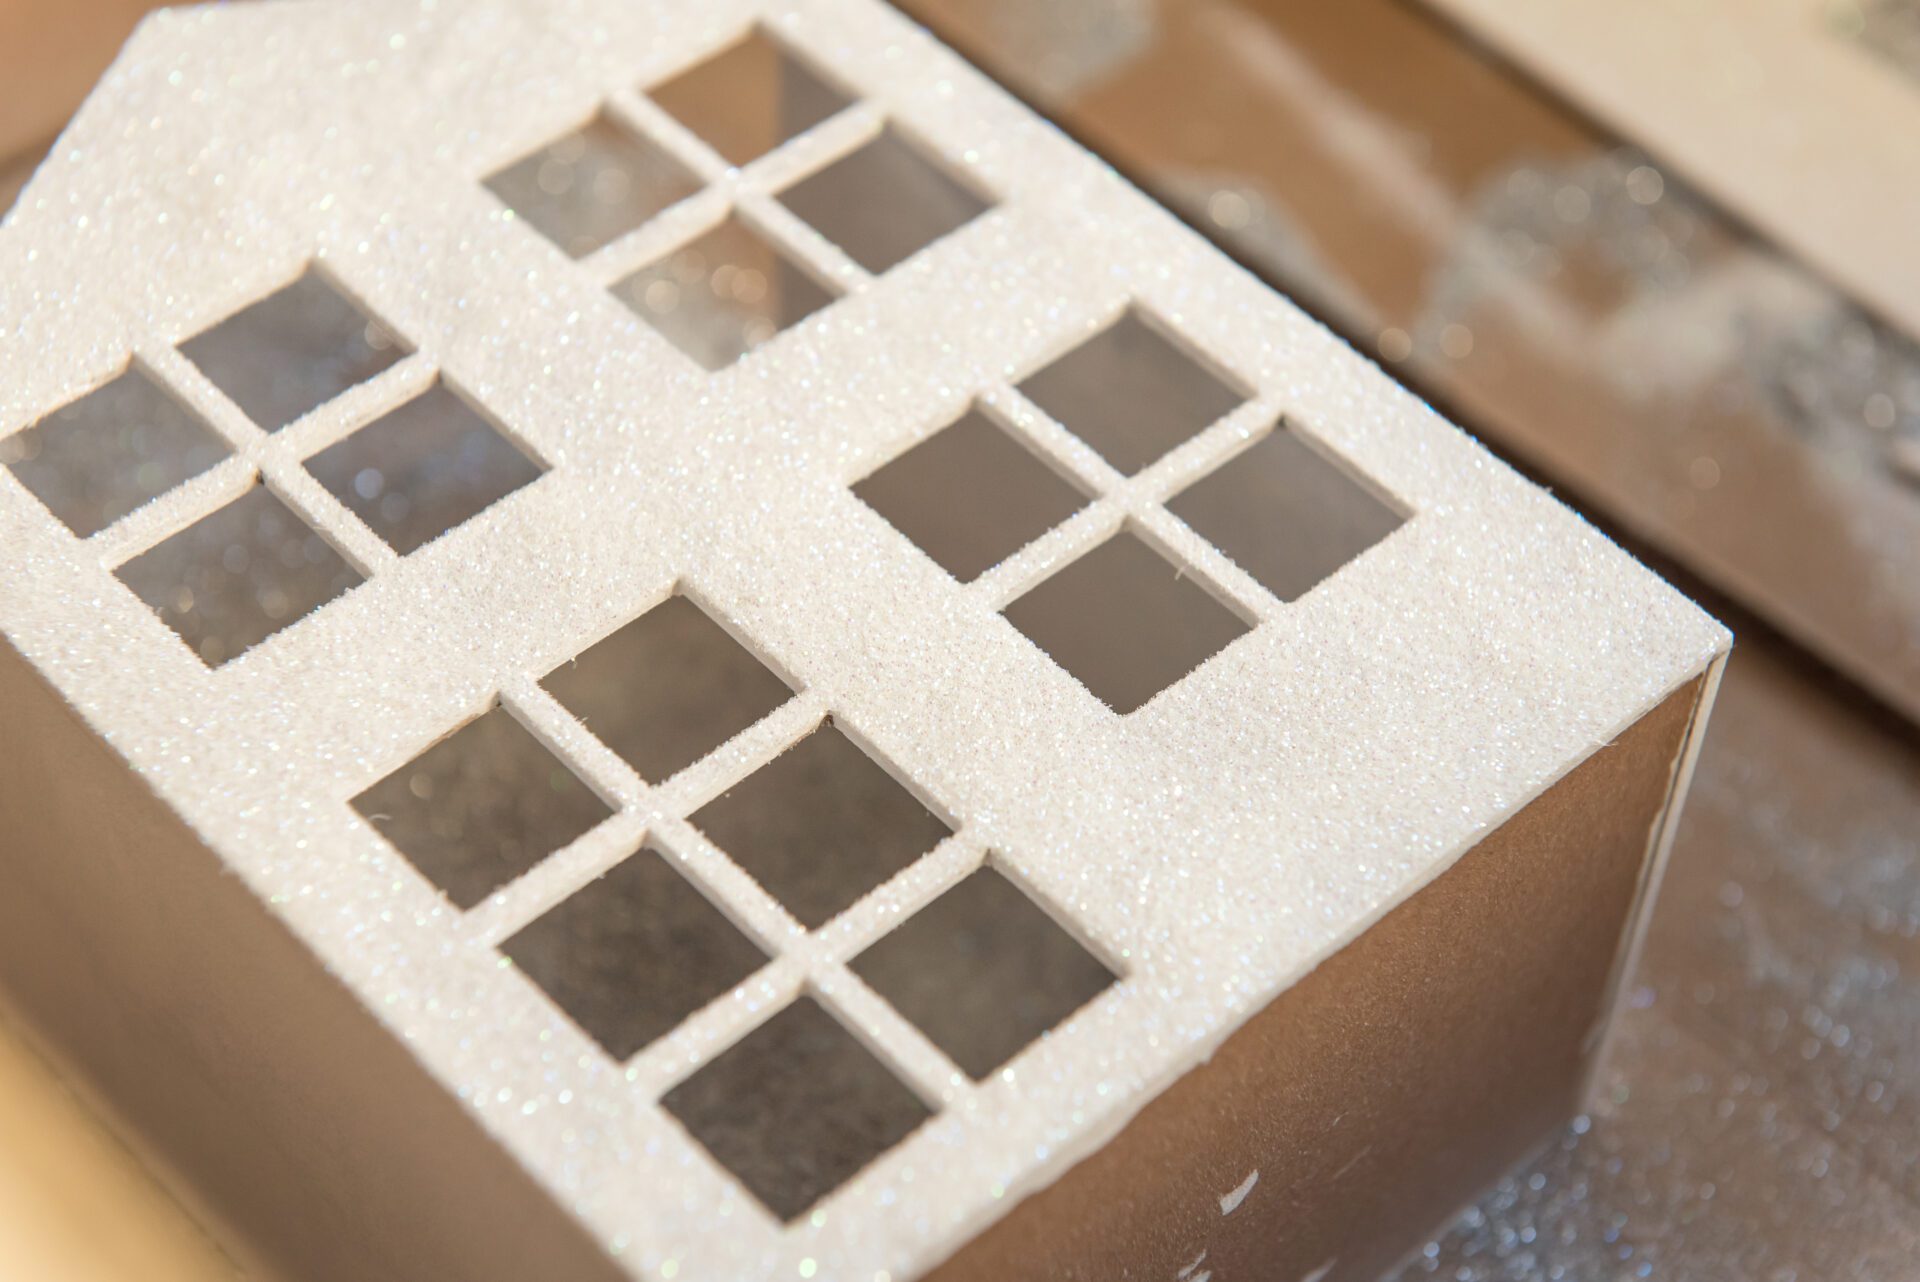

When you are applying glitter to your Pottery Barn Knockoff wreath, you will want to get an old box or newspaper to catch all the extra glitter.
First, you will want to spray the sides and the front with the adhesive spray.
Then sprinkle the white glitter on the pieces of the house.
Punch holes in the bottom of all the stars, except for the smallest ones.
Then spray these with the adhesive spray and sprinkle with the silver glitter.
After the stars dry, attach the floral wire through the bottom of the star and then secure it with the hot glue making it a floral pick.

Next, spray adhesive to the top of the house (roof) and sprinkle it with silver glitter.
Attach the back of the house to the front and the sides.
Once the roof is dry, use craft glue to attach it to the house.
Use your hot glue gun to add the smallest stars to your bottle brush trees.
Wreath Assembly:

You are now ready to assemble your Pottery Barn Inspired Wreath!
You will want to gather all your wreath materials.
First, you will want to cut your garland in half and secure half of the garland to the left side of the hoop with floral wire. Then cover the wire with your floral tape.
Repeat this same process on the right side.

Attach the stars by wrapping the wire around the hope. Use your hot glue gun to secure it if needed.
Add the house to the center of your wreath with hot glue.
Then glue your three bottle brush to each side, then attach your bow to the top of your wreath!
Tips and Tricks for your Pottery Barn Knockoff Christmas Wreath!

- This project is fairly easy, but a little time-consuming. Cutting the chipboard on the Cricut machine can take several hours. And the painting needs time to dry.
- This wreath is for indoor use.
- The little house SVG may be used for other projects like making a little village.
Grab your FREE SVG wreath.svg!
There you have it your DIY Pottery Barn Inspired Wreath for a fraction of the price!
Looking for More Crafts?
Share how your Pottery Barn Knock off wreath turned out in the comments!
Go Ahead and pin this for others!


Michele Tripple is a renowned author and expert in the fields of parenting, relationships, and personal development. With her degree in marriage and family studies, her experience as a Family Life Educator, and over a decade of experience as a professional writer, Michele has authored books that provide practical advice and insights into improving family dynamics and personal growth. Her work is celebrated for its blend of research-driven information and relatable, real-world applications. Michele has been a keynote speaker at conferences and has contributed to numerous publications and media outlets, solidifying her reputation as an authoritative voice in her field and helping families build relationships.
Thank you for the inspiration. I do not have a circuit machine; however, I still made this for less than $10. I purchased the hoop and precut stars from Michaels and the $3 metal house from Target.
i was not able to add my photo??
I am so glad and I can’t wait to see it! Tag me in stories on IG @confessions_of_parenting and I can add it!
This is beautiful! My mom just gave me a gold hoop and I had no idea what I was going to make with it. Now I know! 🙂