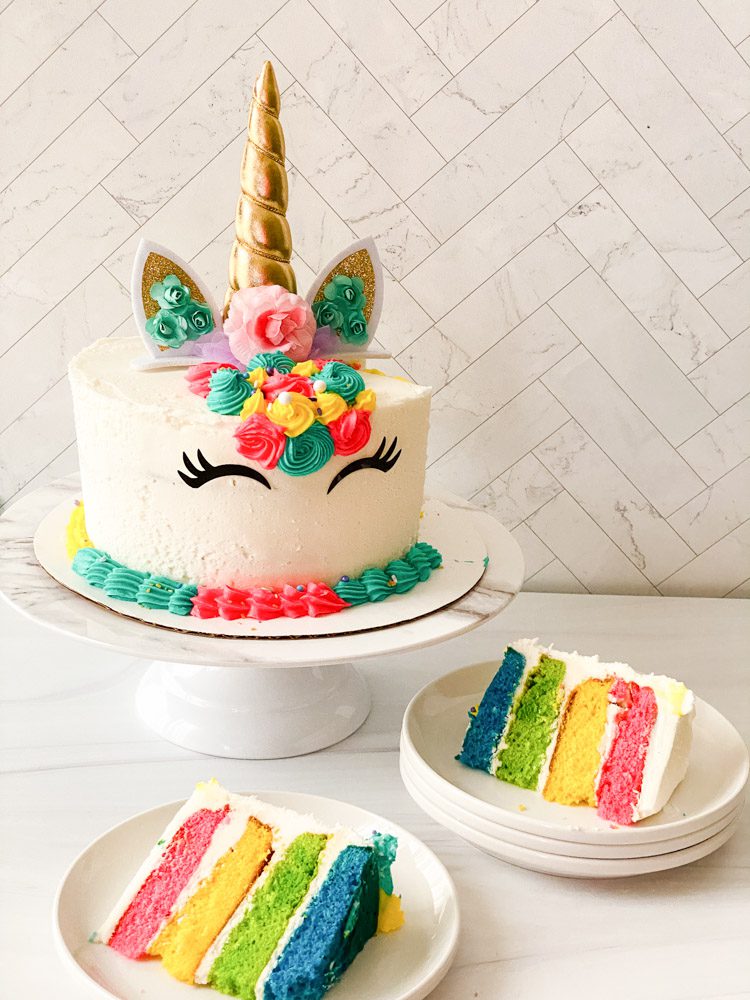
Unicorn Cake is sweeping the nation and I’ve got the easiest instructions for making your own! Get ready to impress the unicorn-lover in your home with these simple rainbow unicorn cake instructions!
The Best Birthday Unicorn Cake
My daughter’s birthday is coming up and she is insisting on a unicorn cake! Anyone else in the same boat? The videos you see on social media make it look easy but I’ve been so nervous about it! Thank goodness I found the cutest cake topper so now I know I can make the cutest rainbow unicorn cake without all the stress!

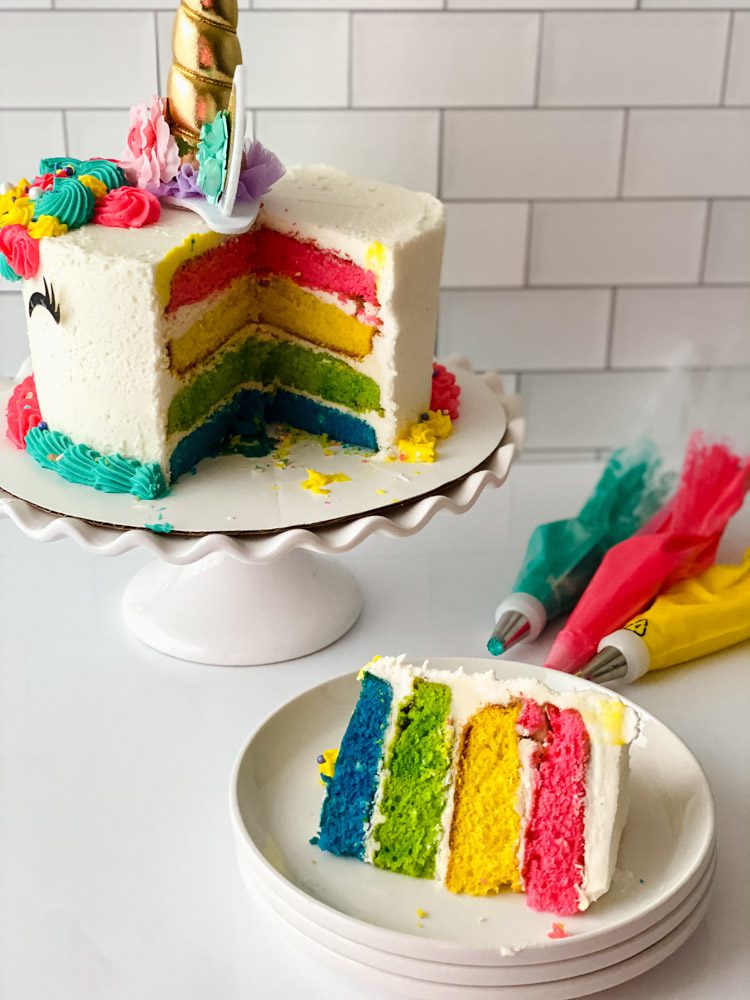
Now I can’t wait to make my unicorn cake because after a few practice tries I’ve come up with the simplest cake that has everything my daughter loves! Rainbow layers, just like our well-loved rainbow poke cake, sweet buttercream frosting, and of course, it looks just like a unicorn!
With the help of the cute cake topper, all you’ll need to make this cake is your favorite cake mix and a bit of buttercream! I promise, it’s not as hard as it looks and your kids will definitely be impressed!
So if you need a unicorn birthday cake or even a just-for-fun cake without the stress, try these simple instructions
More cake recipes you’ll love
Rainbow Unicorn Cake
Simple and adorable, this unicorn cake is such a show-stopper! Your kids won’t be able to resist!
Ingredients
- 2 boxes white cake mix
- Buttercream frosting
- Unicorn cake topper
- Electric gel colors
- Unicorn sprinkles mix
How to make a rainbow unicorn cake
Don’t forget to download the full printable recipe below so you can print it out and use it whenever you feel like making this delicious recipe!
- To make your unicorn cake, start by preparing your cake mixes according to the package directions.
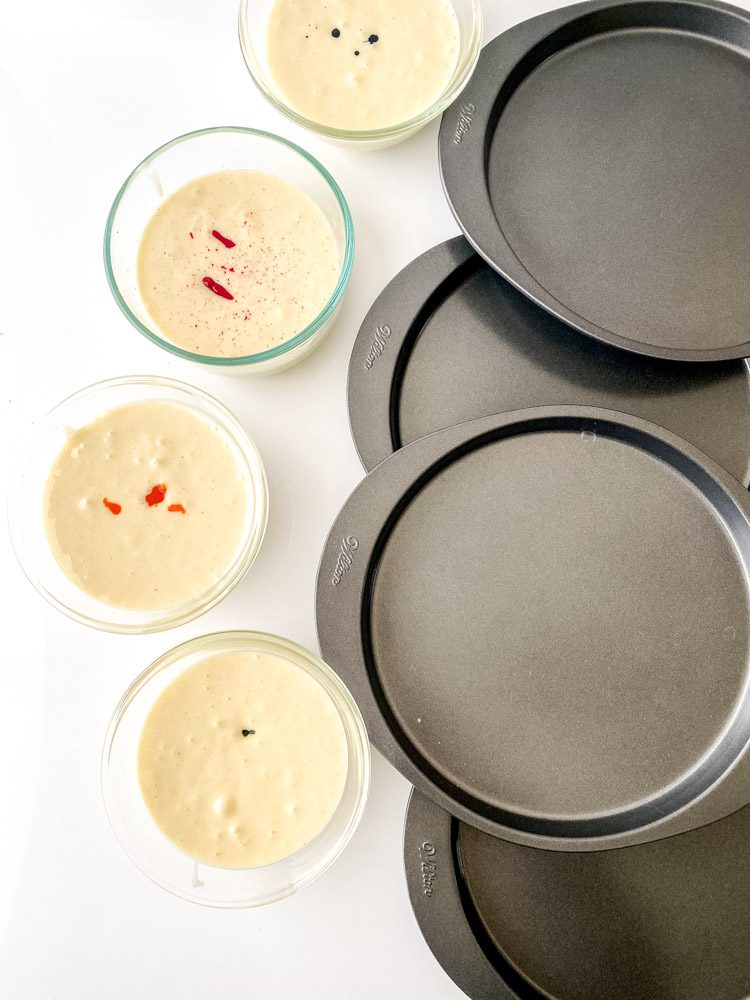
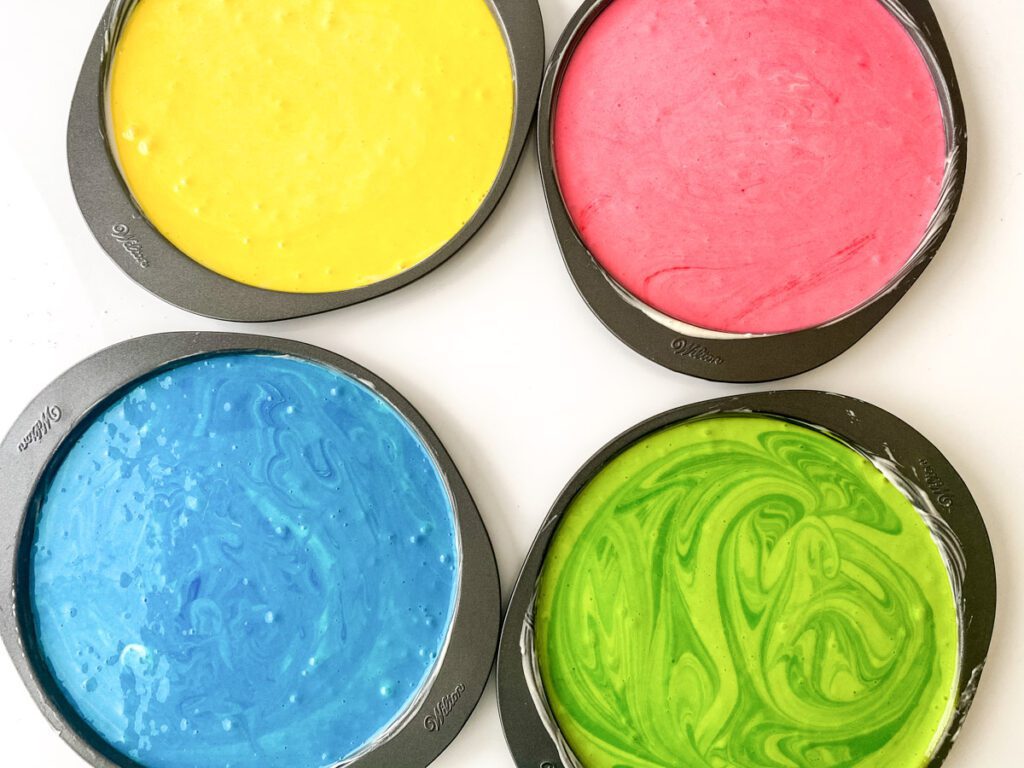
- Separate the cake batter into 4 bowls and add your desired colors of food coloring. You should only need about 1-2 drops of electric food coloring per bowl to get a vibrant color.
- Next, grease your cake pans and add each batter into a separate pan. Bake the cakes at the temperature stated on the package for about 15-20 minutes.
- When you can insert a toothpick into the cake and it comes out clean, the cake is done and can be taken out of the oven.
- Let the cakes cool to room temperature, then wrap them in plastic wrap and place them in the freezer.
- Next, you can make your buttercream according to your recipe’s directions if you are homemaking it, or just grab it if you have bought some.
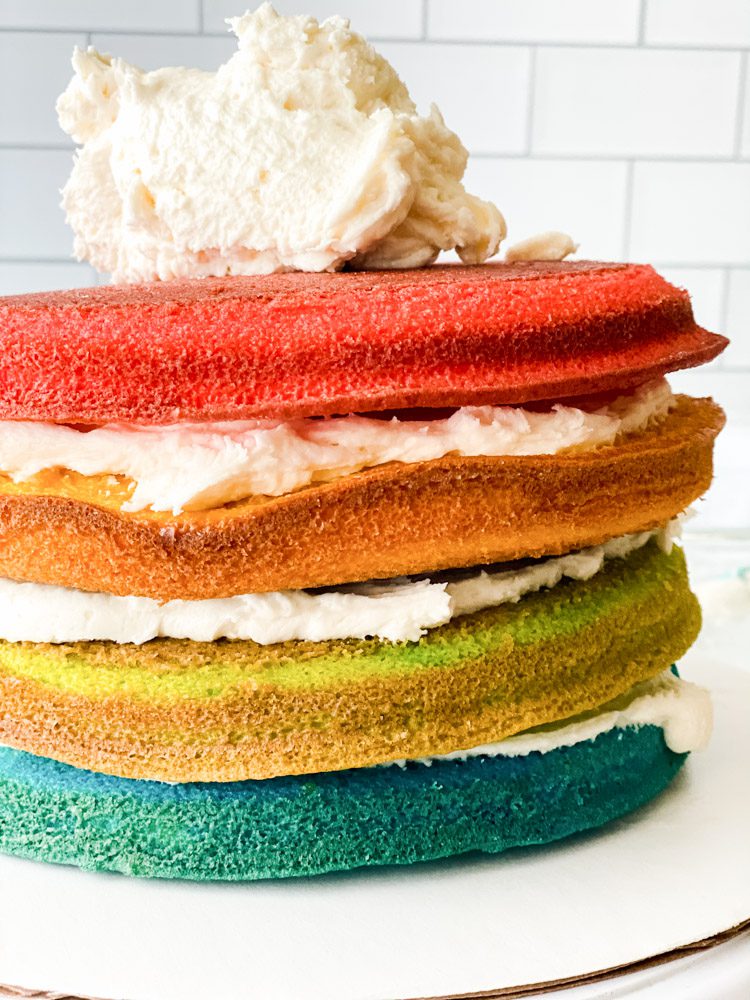

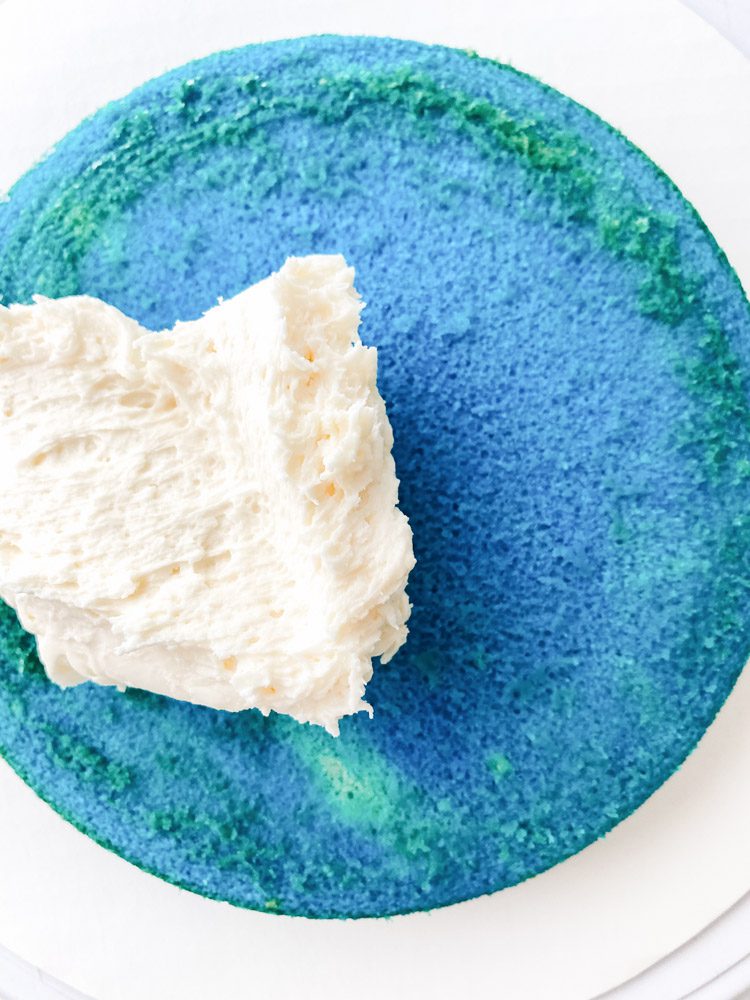
- Take the frozen cakes out of the freezer and stack them up on a cake board in your desired order with a layer of buttercream between them.
- Coat the outside of the cake with a thin layer of buttercream to seal in any crumbs.
- Let the cake set for about 15 minutes either in the fridge or on the counter.
- If desired, add another thicker layer of buttercream on the outside of the cake.
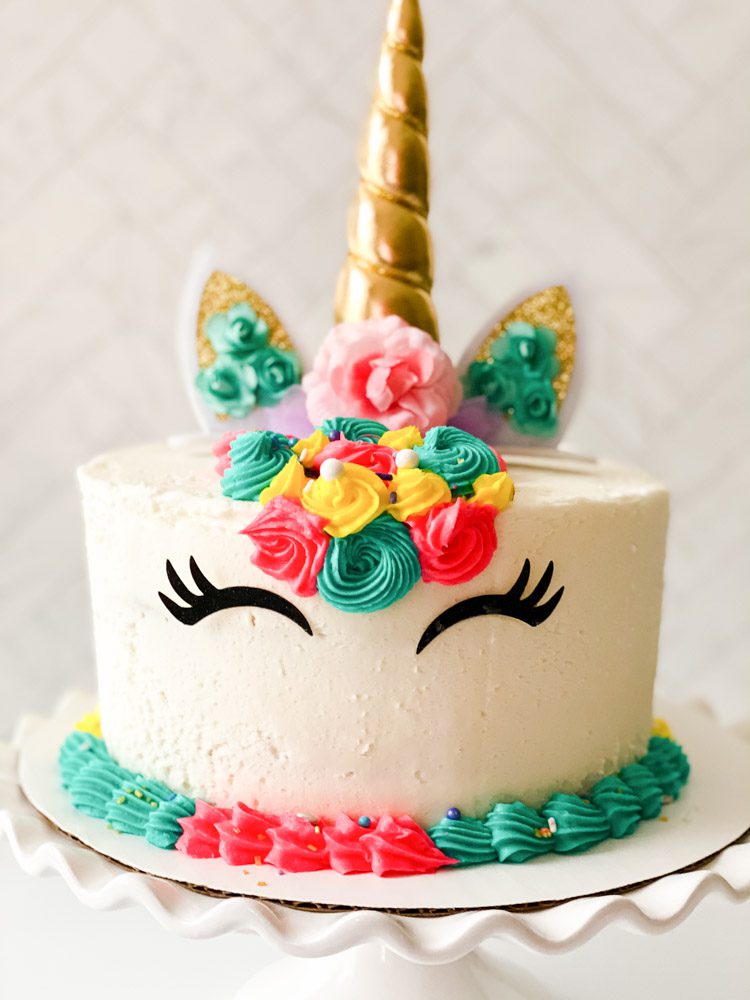
- Next, prepare your colored buttercreams for the unicorn’s mane by adding food coloring to sections of buttercream and placing the different colors into separate piping bags.
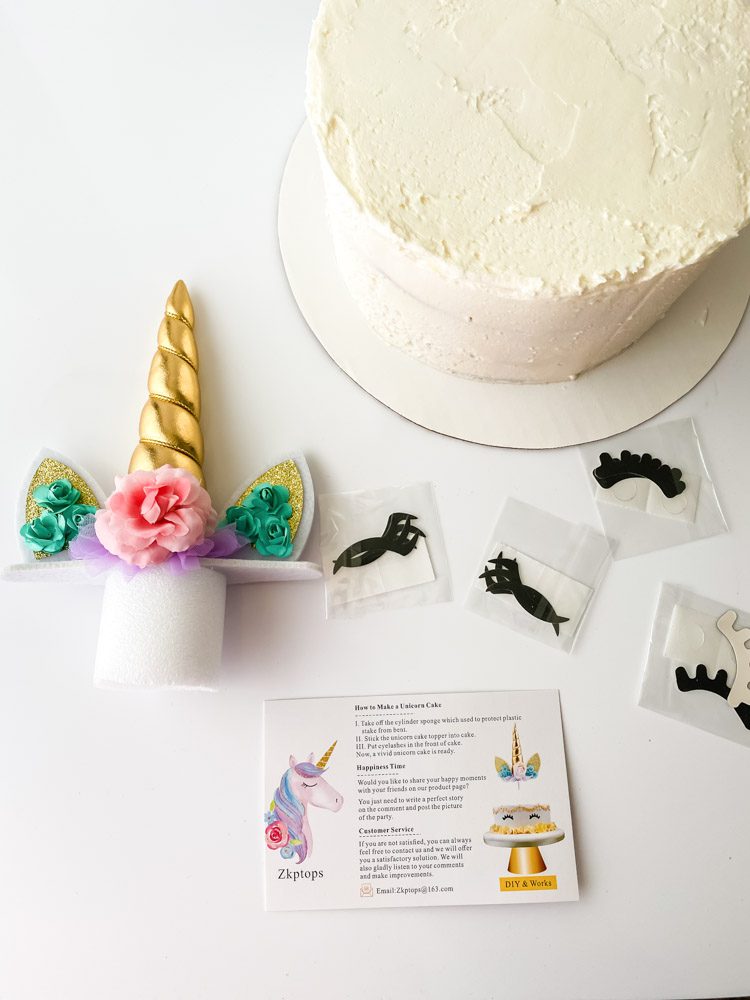
- Remove the horn topper from its package and place it at the center top of the cake.
- Place the eyelashes as centered as you can on the front of the cake.
- Use your piping bags to add little swirls down the unicorn to look like the unicorn’s hair. Make sure you switch colors often to get a rainbow look.
- Stand back and look at your masterpiece!
Tips Tricks and FAQs
- You don’t want to skip the cake-freezing step! It makes a huge difference in the final product to freeze your cakes because it’s easier and cleaner to decorate them. I recommend making your cakes a day before you need them and then freezing them until the day you are ready to decorate. I promise, it makes no difference in the moisture and yummy taste of the cake but helps it look great!
- Did you know you can buy buttercream from your local bakery? Most bakeries sell their buttercream which makes it so much easier! You can still get a homemade taste without worrying about making any yourself!
- You can pipe your buttercream without a coupler, but it is such a huge help when you are switching between colors. That way you don’t have to replace your bag each time you switch colors. Instead, you can just move the tip from bag to bag as you need it.
- When you are piping your swirls, it’s best to hold your piping bag at a 45-degree angle. Then apply pressure as evenly as you can as you squeeze the bag and release it as you pull the bag away.
- Are you always losing your piping tips down your sink or in your dishwasher? I know I always was until I started washing my tips by boiling them for a few minutes and letting them air dry. So much easier and I never ruin or lose them in the wash!
Storage
After serving this cake, you can store it in the fridge for 4-5 days or on the counter for 2-3 days.
If you don’t have one yet, getting a cake stand with a domed lid is such a lifesaver for storage!
What do I do if I don’t have a piping bag?
Piping bags are a great investment and I always find myself using them.
But you can try using a small sandwich-size resealable bag! They actually work pretty great. You won’t have quite as much stability as you pipe, but it’ll get the job done.
More Easy Cake Recipes
Did you make this?
Unicorn Cake
Unicorn Cake is sweeping the nation and I’ve got the easiest instructions for making your own! Get ready to impress the unicorn-lover in your home with these simple rainbow unicorn cake instructions!
Ingredients
- 2 boxes white cake mix
- Buttercream frosting
- Unicorn cake topper
- Electric gel colors
- Unicorn sprinkles mix
Instructions
- To make your unicorn cake, start by preparing your cake mixes according to the package directions.
- Separate the cake batter into 4 bowls and add your desired colors of food coloring. You should only need about 1-2 drops of electric food coloring per bowl to get a vibrant color.
- Next, grease your cake pans and add each batter into a separate pan. Bake the cakes at the temperature stated on the package for about 15-20 minutes.
- When you can insert a toothpick into the cake and it comes out clean, the cake is done and can be taken out of the oven.
- Let the cakes cool to room temperature, then wrap them in plastic wrap and place them in the freezer.
- Next, you can make your buttercream according to your recipe’s directions if you are homemaking it, or just grab it if you have bought some.
- Take the frozen cakes out of the freezer and stack them up on a cake board in your desired order with a layer of buttercream between them.
- Coat the outside of the cake with a thin layer of buttercream to seal in any crumbs.
- Let the cake set for about 15 minutes either in the fridge or on the counter.
- If desired, add another thicker layer of buttercream on the outside of the cake.
- Next, prepare your colored buttercreams for the unicorn’s mane by adding food coloring to sections of buttercream and placing the different colors into separate piping bags.
- Remove the horn topper from its package and place it at the center top of the cake.
- Place the eyelashes as centered as you can on the front of the cake.
- Use your piping bags to add little swirls down the unicorn to look like the unicorn’s hair. Make sure you switch colors often to get a rainbow look.
- Stand back and look at your masterpiece!

Michele Tripple is a renowned author and expert in the fields of parenting, relationships, and personal development. She is a certified Life Coach with her degree in marriage and family studies, her experience as a Family Life Educator, and over a decade of experience as a professional writer; Michele has authored books that provide practical advice and insights into improving family dynamics and personal growth. Her work is celebrated for its blend of research-driven information and relatable, real-world applications. Michele has been a keynote speaker at conferences and has contributed to numerous publications and media outlets, solidifying her reputation as an authoritative voice in her field and helping families build relationships.